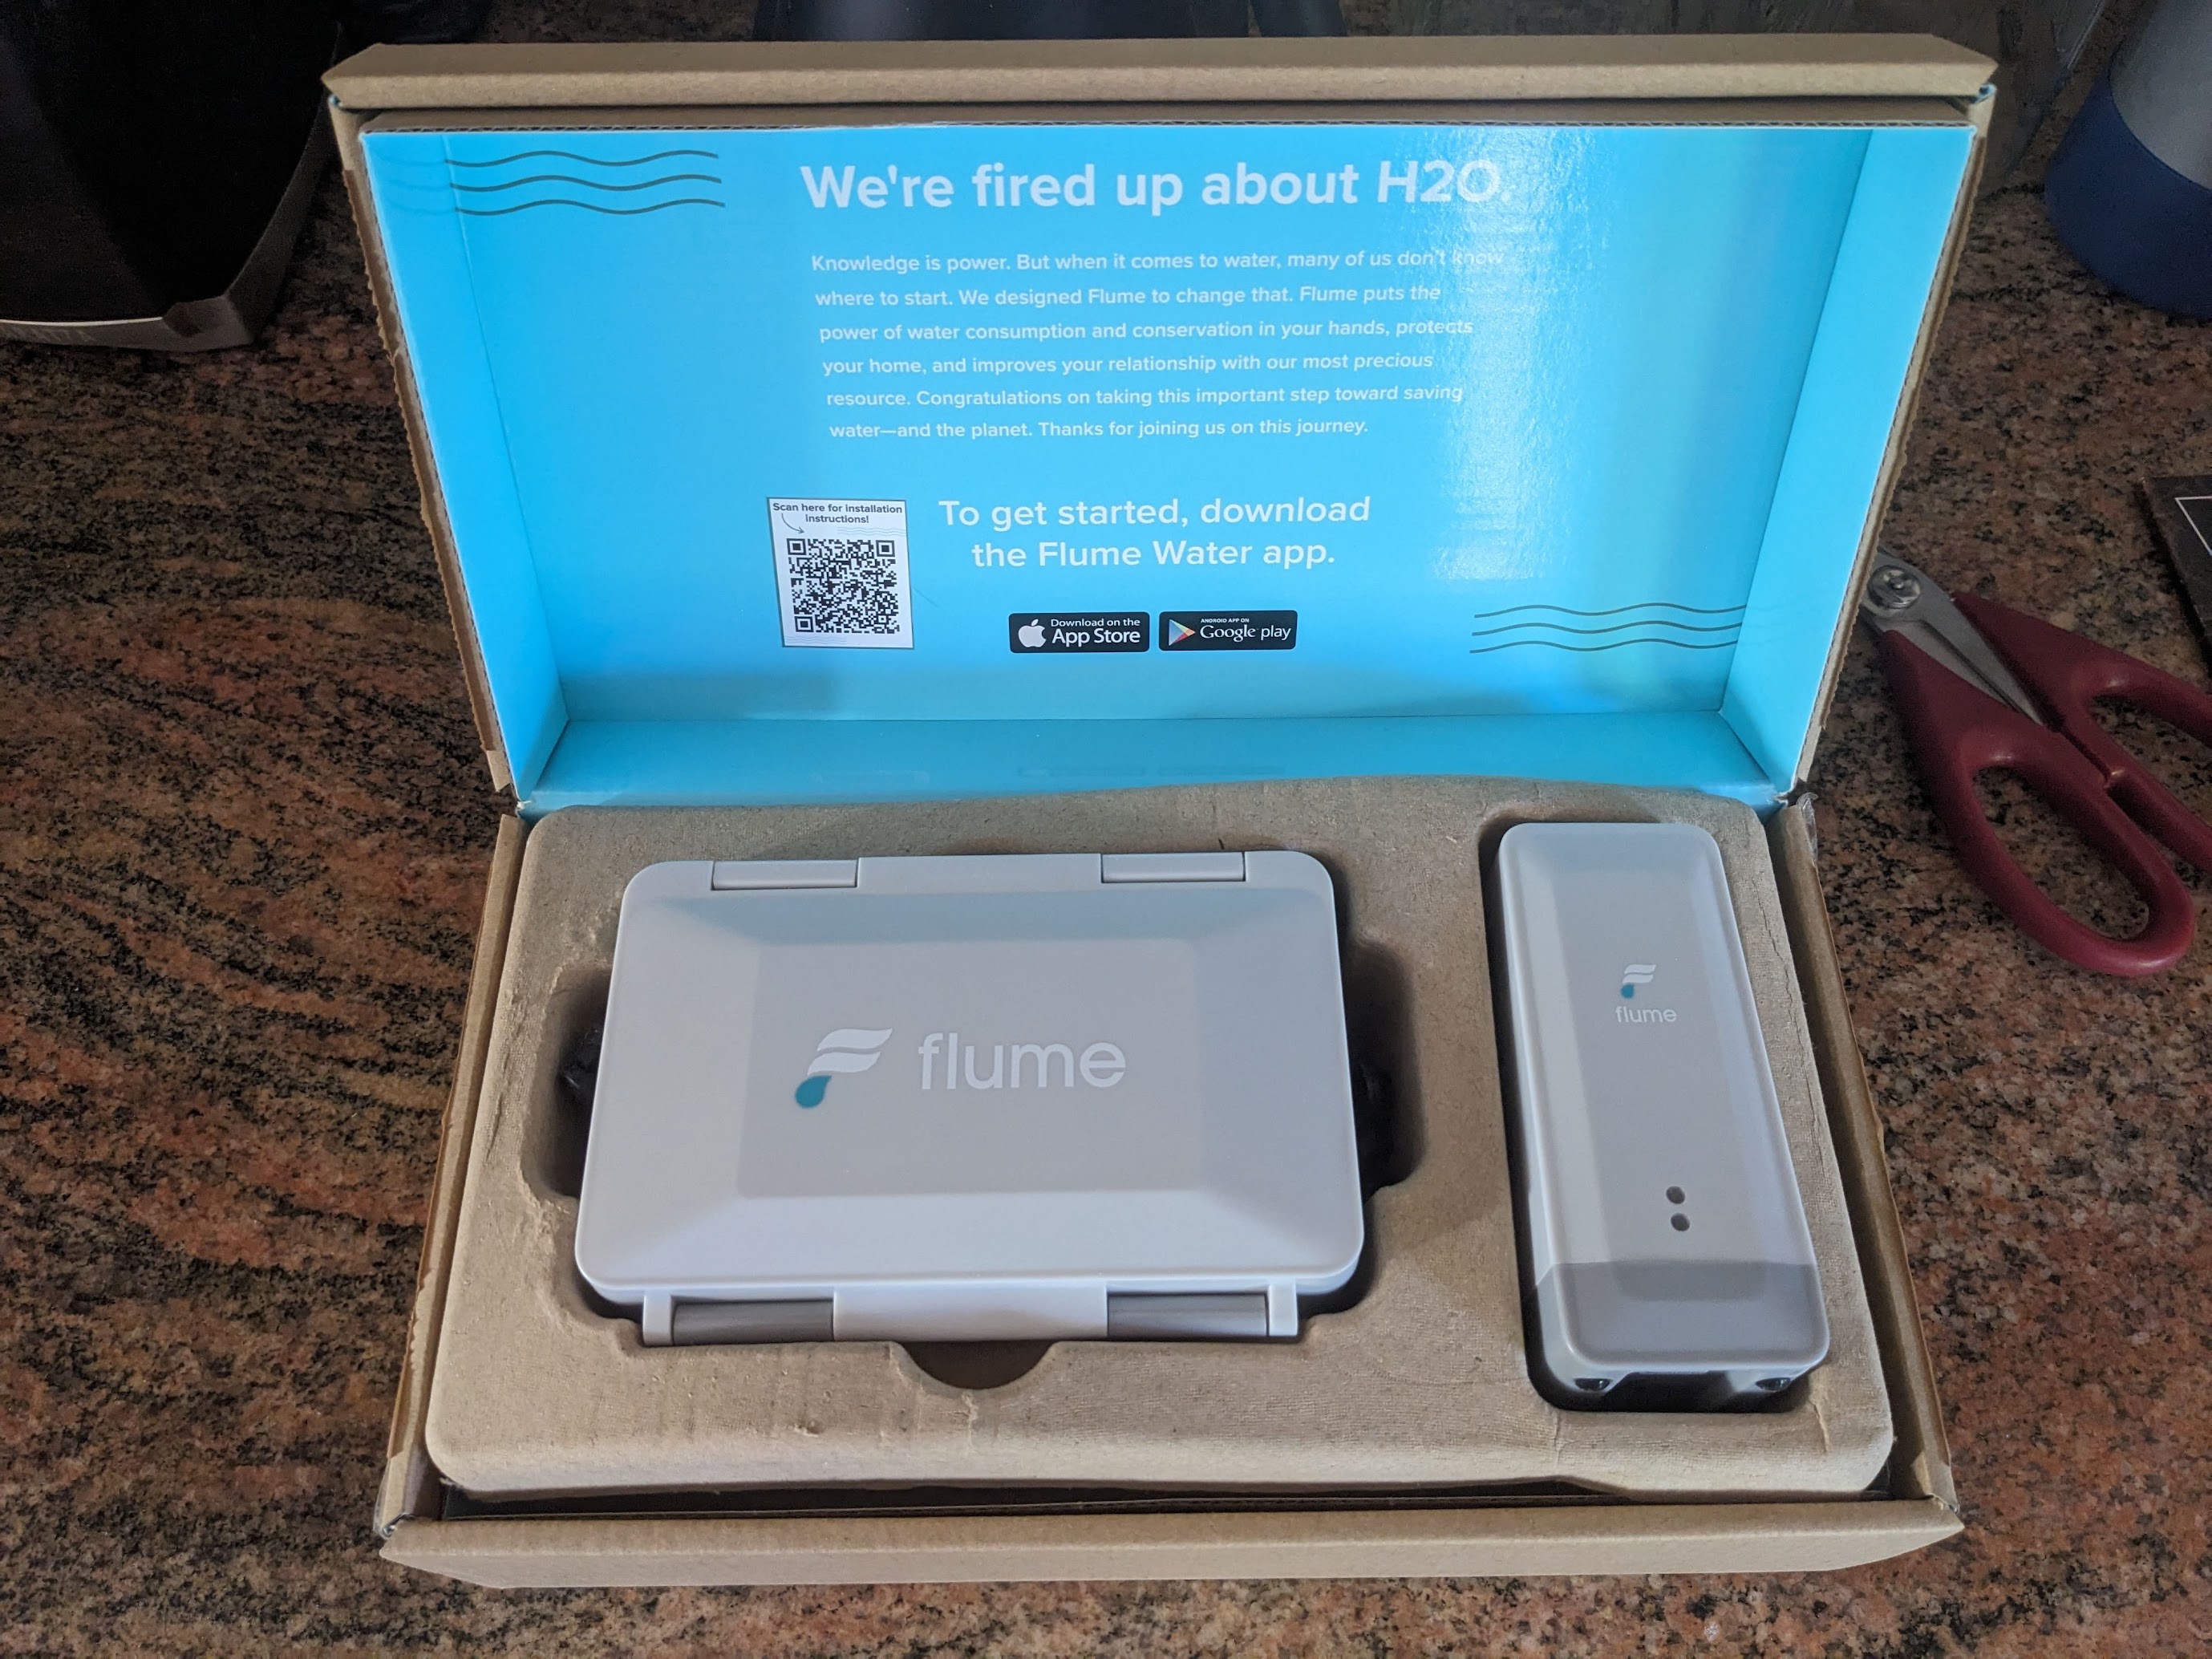
About a year ago, I bought a smart home water monitor in order to keep an eye
my water use at home. The city where I live provides a big rebate on one
particular device from San Luis Obispo company Flume. I was immediately curious
about how this device could work and was excited to open the box when it
arrived and inspect the contents.
There are two hardware components in this system. One component, the sensor, is
designed to be physically strapped to your water meter. The other component,
the bridge, receives information from the sensor and connects to the Internet
via Wi-Fi to deliver all this data to Flume. Flume provides an API for
customers to access their own data and there’s even a Home Assistant plugin
which should help bring all this information to the platform I run at home.
But I wanted to learn more about how this all works and was curious if there
could be a way to access this data more directly. As friendly as Flume seems to
be, I do feel that if I buy a device to track my own data, that data should
belong to me. But also, it would be nice to know that if Flume ever closes up
shop or shuts down its web service, that these devices could all still be
useful. So let’s take a closer look at the hardware to see what’s really
happening.
Continue reading »
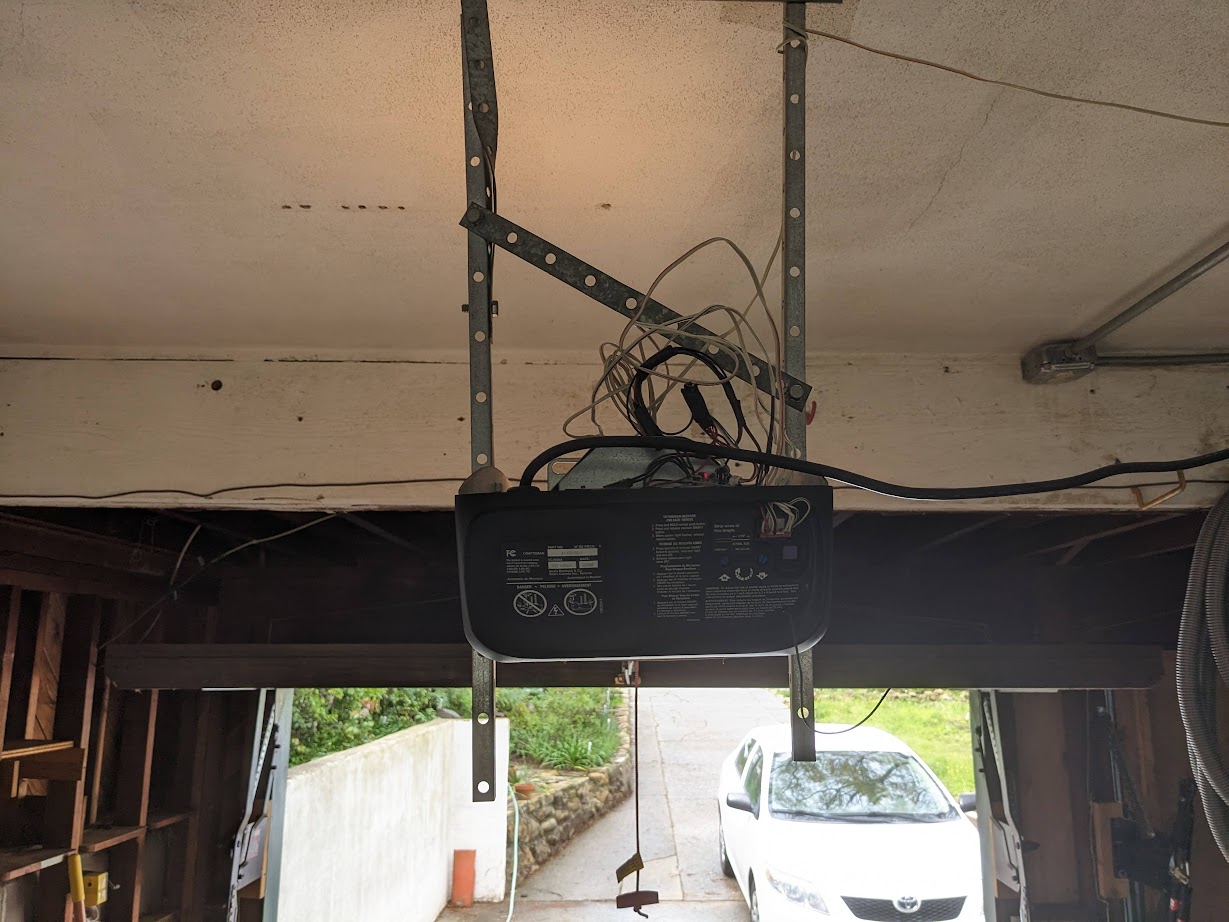
In 2023, I managed to integrate my garage doors with HomeAssistant using a
Shelly Uni device.
Controlled remote operation is pretty great, but I wanted to document this
project because this solution covers remote door control, door state and even
door light control is possible, using a single $12 device with no batteries
required. The setup is easy to achieve, and leaves all the garage door opener
functionality in tact.
Overview
- Shelly Uni device is powered from a 12v DC power source leeched from the
low-voltage side of the garage door control circuit board
- Garage door switch is operated using one of the two potential free outputs on
the Shelly Uni
- Garage door state is monitored using both Shelly Uni inputs, detecting
open/closed circuits on the garage door opener’s own state sensors
- Light control is not implemented, but could be added to the extra Shelly
Uni output in an extremely simple circuit
Continue reading »
A binary clock is hardly a new idea, but this particular concept is
something I haven’t seen anywhere else. And it was idling in the back of
my mind for over a decade before finally seeing a working prototype.
Concept
The passage of time can be measured in any number of ways, but when a
clock is designed for humans, I think it should be based on a natural
concept. Since I live on Earth, I designed a clock, as many others have,
based on the smallest natural temporal concept I can readily observe:
the day.
The day is plenty useful for medium-term planning, but it lacks the
precision needed for many purposes, and so it must be divided in order
to build a useful clock. This is where clock design becomes much more
arbitrary. Dividing the day into 24 was supposedly based on astronomical
observations of various stars passing in the night, but beyond that,
there’s no natural reason there should be 60 minutes in an hour and so
on.
My thought, is that the simplest and most natural way to divide a day
would be in half. This is essentially the AM/PM indicator which is a
concept so natural and necessary, that even many of our 12 hour clocks
use it to avoid the otherwise ambiguous information displayed. But if
the most natural way to divide a day is in two, then maybe the next most
natural division is in two again. Dividing a day repeatedly in two
results in a kind of binary clock. And this is exactly the concept.
Continue reading »
If you’ve been following along with my wifi radio posts, you may recall
my problem of storage for the platform. I chose an ultra-low power and
nearly zero storage device for my music collection because I planned to
buy an external storage device and serve music from that device. I still
think that’s a good idea, but I’m too cheap to spring for the kind of
device I really want. So I’ve been experimenting with cloud storage
which has a number of big advantages which I won’t get into here.
Continue reading »
In part 1 of
this series, I took an Asus router and loaded openwrt onto it. I added
an LCD display and connected it to the serial port on the router board.
At this point, I have a low-power, small form factor computer that I can
customize to my heart’s content. As far as I/O, the computer still has
its original wifi antenna, 5 wired LAN interfaces, a serial port and a
USB port. My USB sound adapter still hasn’t arrived from Hong Kong, so
I’m going to work on another piece of the puzzle.

The first thing I did after joining this device to my wifi network
was telnet in and change my password. Now the project that I’ve been
following up to this point is mainly to be used for playing internet
radio stations as I understand it. My wifi radio is going to be used for
that too, but also for playing selections from my own music library. I
plan to get one of these Buffalo 1TB Linkstation NAS devices and put all
my media on it and leave it down in the basement. I’ve read that you can
really customize these devices, but all I need to do is add an ssh
server to it. Then I can mount the whole filesystem to a folder on my
wifi radio and have access to a full terabyte of storage space.
Continue reading »