A binary clock is hardly a new idea, but this particular concept is something I haven’t seen anywhere else. And it was idling in the back of my mind for over a decade before finally seeing a working prototype.
Concept
The passage of time can be measured in any number of ways, but when a clock is designed for humans, I think it should be based on a natural concept. Since I live on Earth, I designed a clock, as many others have, based on the smallest natural temporal concept I can readily observe: the day.
The day is plenty useful for medium-term planning, but it lacks the precision needed for many purposes, and so it must be divided in order to build a useful clock. This is where clock design becomes much more arbitrary. Dividing the day into 24 was supposedly based on astronomical observations of various stars passing in the night, but beyond that, there’s no natural reason there should be 60 minutes in an hour and so on.
My thought, is that the simplest and most natural way to divide a day would be in half. This is essentially the AM/PM indicator which is a concept so natural and necessary, that even many of our 12 hour clocks use it to avoid the otherwise ambiguous information displayed. But if the most natural way to divide a day is in two, then maybe the next most natural division is in two again. Dividing a day repeatedly in two results in a kind of binary clock. And this is exactly the concept.
Design
Let’s explore the design I’ve had in mind. This idea has taken many shapes in my head over the years, but the picture I’ve had in mind most often is a series of LEDs, each representing a successive division of one full day.
For a practical, human-oriented clock, we’ll need enough precision to be useful for normal human activity. One single LED cuts the day in half, providing half-day precision, but that’s far too granular to be able to plan intra-day activities. Adding two more LEDs takes the precision down to 1/8th, and with four you get 1/16th of a day. For any number of LEDs, the precision of this clock is 1 / (2 ^ n).
Since this way of dividing days is unfamiliar, let’s look at further divisions to see what it would take to end up with a useful clock. Each item below shows the level of precision (in 24 hour terms, rounded to the nearest second) that could be reached with the given number of LEDs:
- 12:00:00
- 06:00:00
- 03:00:00
- 01:30:00
- 00:45:00
- 00:22:30
- 00:11:15
- 00:05:38
- 00:02:49
- 00:01:24
- 00:00:42
- 00:00:21
- 00:00:11
- 00:00:05
- 00:00:03
- 00:00:01
In order to approach one second precision, we would need 16 individual LEDs. And even that final light would represent a period of time slightly longer than a second. But down-to-the-second precision isn’t often required in day to day human activity. Since I want to learn to read my own clock, I decided to try to keep the display as simple as possible, and that means using as few lights as I can get away with.
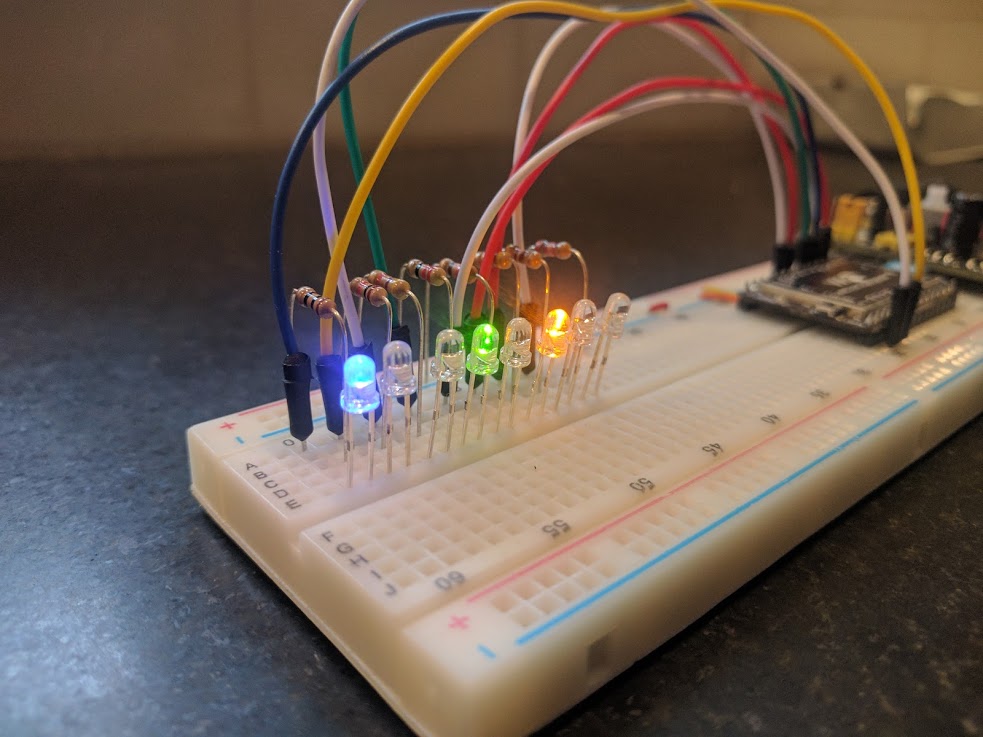
Eight LEDs give me a good balance. I don’t usually need more precision than I can get out of eight bits and keeping the LED count down to eight should make the clock easier to read. Here are a few examples of how this clock display could be translated into conventional 12/24 hour format.
o o o o o o o o <-> 12:00:00am
o x o o o o o o <-> 06:00:00am
x o x o o o o o <-> 03:00:00pm
x o x x o o o o <-> 04:30:00pm
x x x o x x x o <-> 10:18:45pm
The first few digits are very easy to learn to read, but they get more difficult if you plan on translating them to the convetional format in your head. One of the things I’m most curious about, is how hard it will be to learn to understand the meaning of this clock without having to do the conversion.
The information in the clock gets progressively more granular as you read from left to right. It may be that the first 4 LEDs can give you all the precision you need, but as with a conventional digital clock, you can decide where to stop reading when you’ve gathered enough information.
Hardware
The recent explosion in the number of low-cost WiFi enabled development platforms was the driving force behind why I finally started on this project. Previous systems were either too bulky, power hungry and expensive, or would have required a lot more effort on my part.
In order to avoid implementing a system for manually setting the current time on this clock, I wanted a platform that included easy internet connectivity so the clock could set itself using NTP. For me, WiFi was part of this requirement along with all the nice network interface features we’ve come to know and love like DHCP support and a working TCP stack and preferably HTTPS support in case I want to get really fancy.
Of course, a real-time clock (RTC) is important when building a clock and it’s nice to have one built-in. It’s always possible to add your own, but my hardware experience is limited and a microcontroller that includes an RTC allows me to skip that hurdle. I also wanted enough I/O pins with enough power to drive 8 LEDs so as to not require fancy multiplexing or extra circuitry. Other concerns are power consumption, cost, and how easy the platform will be for a software person like me to learn.
In the past, for WiFi connected projects, I’ve used arduino and a repurposed wireless home router because those were the best options available at the time. But today, there are all kinds of other interesting options. WiPy is the one I ended up on for no particular reason other than I found it early on in my search and it ticks all my requirement boxes.
One other interesting thing about the WiPy is that you can write software for it using tiny version of Python called MicroPython. For me, this is an advantage over alternatives like Wiring/Processing which I’ve battled before. Python is a more comfortable environment.
Software
True to my open source roots, I created a GitHub project to house and track the evolution of the software that drives Byte Clock. I likely won’t do a whole post on how the software works because it will likely evolve and anyone with sufficient interest can keep an eye on the GitHub project for updates. It’s enough to say that the software is responsible for synchronizing the real time clock with an NTP server and managing the state of the clock’s display.
Blinking an LED
In addition to the WiPy microcontroller, I bought a cheap 3.3v power supply from Amazon and a bread board. The power supply takes 6.5-12v DC input and provides 3.3v or 5v DC output. In this photo, I’ve got the power supply and the WiPy connected on the bread board. Here’s what it looks like powered on for the first time.
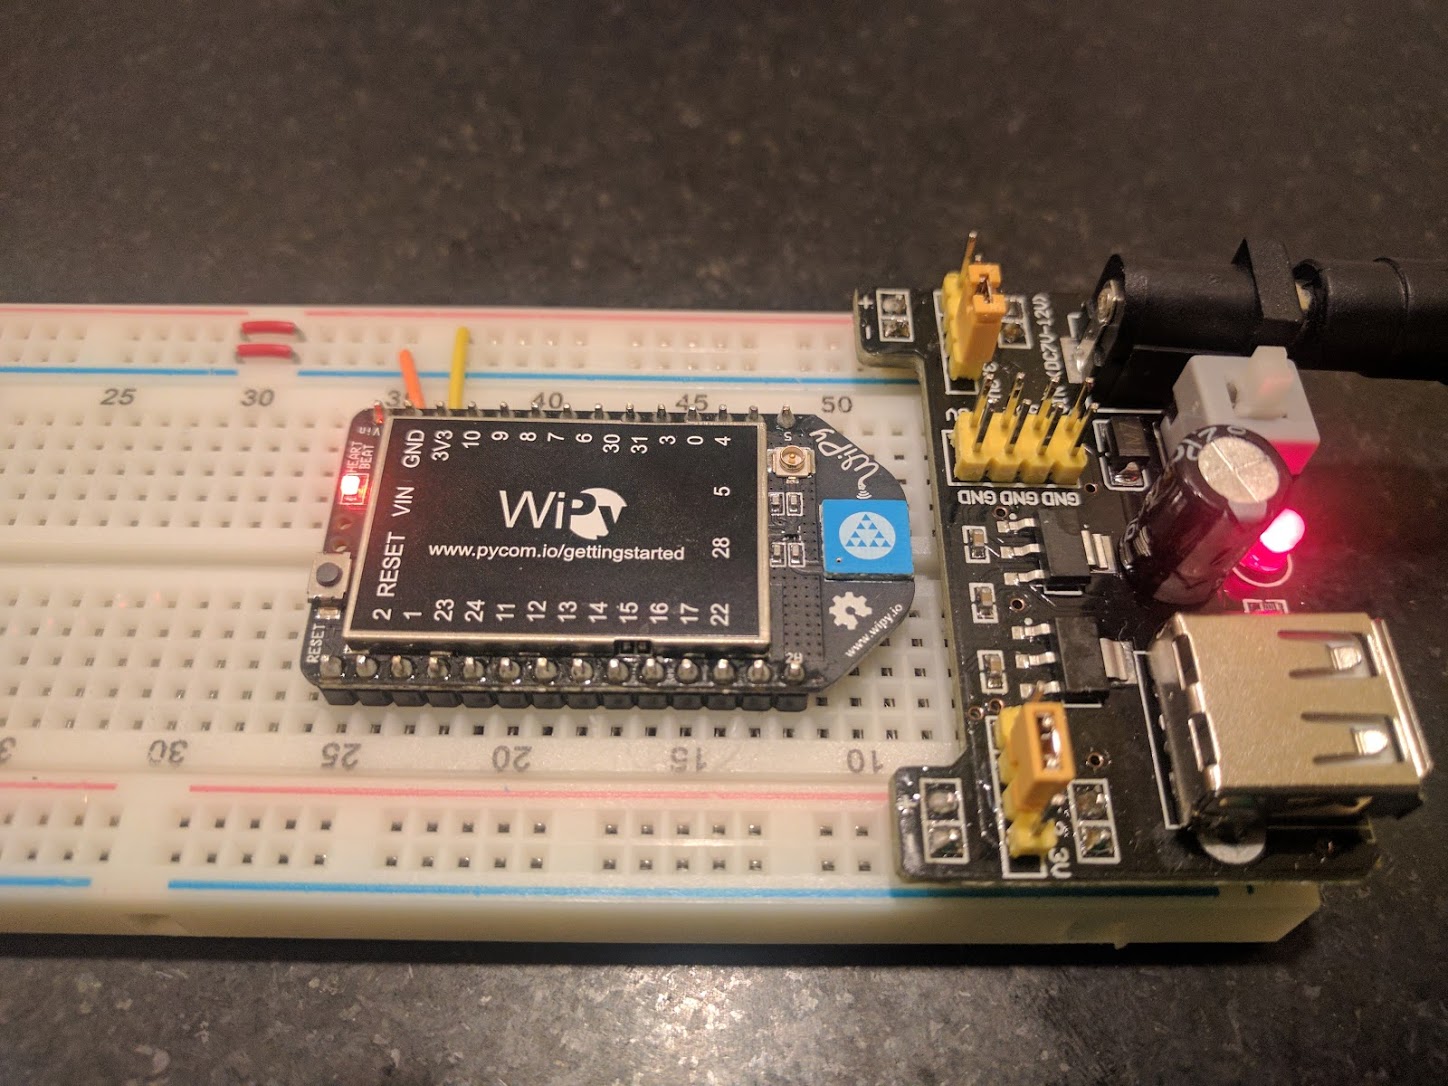
Getting up and running with the WiPy was pretty simple once I figured it out. When the WiPy powers on for the first time, it creates its own wireless network which anyone can join and from there you can upload your own code over FTP. Adafruit has a handy guide with more detail on how to get started.
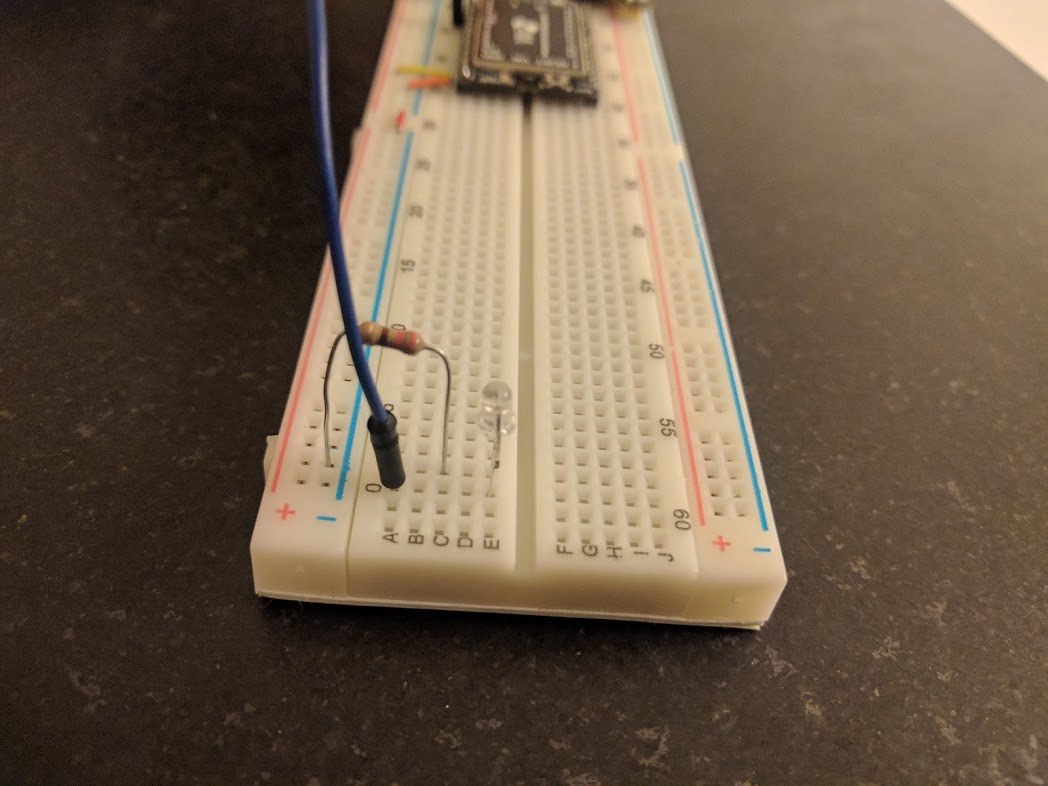
Here’s a very exciting video of the moment when I made it past the first hurdle, blinking an LED.
Setting Up the Display
The clock display amounts to a binary counter, so that was a natural next step. I chose eight different colored LEDs and hooked them up to the first eight I/O pins on the WiPy. The various colors have differing forward voltage Vf values and different brightness properties. In order to roughly match the brightness levels, I had to choose different current limiting resistor values for each one. Attempting to match the current of each LED methematically resulted in wildly differing brightness levels, so choosing the right resistor values ended up being a lot of trial and error.
The display test program didn’t take long to write. Here it is in action.
Implementing the Clock
With the LEDs connected to the WiPy and the WiPy connected to the internet, the rest is software.
It would have been awesome to build a Byte Clock without having to use a conventional clock to drive it, but that was the simplest available option. If you examine the source code, you’ll see the time keeping is done using the MicroPython RTC class. The system boots, grabs the current time from an NTP server, sets the real-time clock and sets a timer to increment the display state every interval.
Next
I’ve had this clock running on my kitchen counter for a few months and it’s still keeping accurate time aside from missing the time change. I’ll need to implement that function. Thinking about this clock has made me ask all kinds of questions about the nature of conventional clocks and how we go about our days.
For instance, why should clocks start at midnight? And what exactly is midnight by the way? Would it make sense for clocks to start counting at sunrise or noon instead? It might, and I haven’t ruled out playing with that idea. But going down that road makes conversion to convetional 24 hour time a lot more difficult.
Why should clocks count up and not down? We could just as easily design a clock that counts down the time remaining in each day. Would that be good?
Communicating information about moments in time with the byte clock is presents a challenge. Reading all eight digits aloud would be inconvenient (“on off on on on off off on”). But since this is a Byte Clock, the time could be expressed with just two hexadecimal digits (b9). That’s a pretty concise way to express the time of day at this level of precision.
After pondering the differences between the Byte Clock and conventional clocks, it seems more clear that the values 24 and 60 are not at all arbitrary. Conventional clocks are easily divided in half, thirds, fourths, sixths and eigths. The Byte Clock is, of course, only divided easily by powers of two. I think I knew this all along, but having built this clock makes me appreciate this aspect of conventional clocks.
Next, I’m planning to play with the arrangement of the LEDs with the goal of making the clock easier to read. And after that, I’d like to design a slick looking case and build something that looks a bit more professional.